


Whisk & Wonder: December's Featured Ideas
- Jennifer Preston
- Dec 13, 2025
- 4 min read


by Karen
Cozy Creativity in the Heart of December
December is already in full swing. The lights are up, calendars are full, and the excitement leading up to Christmas is everywhere. As the days get busier, having simple, hands on activities ready to go can make all the difference for kids who need a calm moment to reset and create.
This month’s Whisk & Wonder focuses on easy and inexpensive holiday ideas that fit right into real life. Crafts and treats that require minimal prep, use affordable supplies, and still feel special. Perfect for families at home, those traveling for the holidays, or children spending time with a trusted sitter.
We hope these December favorites help bring a little calm, creativity, and cozy joy to the rest of your holiday season.
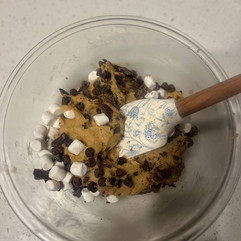
S’more Chocolate Chip Cookies
Ava's personal favorite cookie recipe for the holiday season!
This recipe makes about 15-20 cookies.
What you’ll need
1 1/4 cups all-purpose flour
1/2 tsp baking soda/powder
1/2 tsp salt
1/2 cup butter (browned & cooled)
1/3 cup sugar white
1/2 cup brown sugar
1 egg
1 tbsp vanilla extract
1/3 cup Semisweet chocolate Chips
1/2 of Baker’s German’s Sweet Chocolate Bar
1/2 cup of mini marshmallows
How to Make Them
1. Preheat the oven to 350°F. To prevent sticking, line a baking sheet with parchment paper or lightly coat it with oil spray.
2. In a bowl, whisk together the dry ingredients.
3. In a separate bowl, cream the butter and sugars until light and fluffy.
4. Incorporate the egg and vanilla extract.
5. Gradually add the dry ingredients to the wet mixture, mixing slowly to ensure it's well incorporated.
6. Chop the chocolate bar into small chunks.
7. Add the chocolate chunks and marshmallows to the dough.
8. Place spoonfuls of dough onto the baking sheet and bake for 9-11 minutes.
9. Let the cookies cool before serving and then enjoy!
Baking Tips for the Best S’more Cookies
Freeze the marshmallows so they don’t melt while baking
Slightly under bake for softer cookies
Use room temperature ingredients for even mixing


🎁 Directions & Photos submitted by Ava ~ learn more about this amazing caregiver at
Reindeer Cards
A simple craft to keep little ones busy during the days leading up to Christmas
This reindeer card craft is perfect for toddlers through elementary ages and can be set up in just minutes. It works beautifully for babysitters, holiday play dates, classroom parties, or slow afternoons when kids are counting down the days until Christmas.
What You’ll Need
Brown construction paper
Pre-cut paper strips or circles
Glue sticks
Googly eyes
Markers or crayons
Pom poms or red stickers for noses
Optional embellishments
Stickers
Glitter glue
Ribbon
Foam shapes
How to Make Them
Set up a craft tray with all materials laid out and ready to grab.
Help kids choose a brown paper base and fold it in half to make a card.
Use circles or strips to create the reindeer face and antlers.
Glue on googly eyes and add a pom pom or sticker for the nose.
Decorate with markers, stickers, or glitter glue.
Inside the card, write a short message or help younger kids dictate one.
🎄 These make sweet keepsakes for parents, grandparents, teachers, or even holiday place cards at the dinner table.
Why We Love It
This craft encourages creativity, independence, and focus while still feeling festive and low pressure. Each reindeer comes out totally unique and kids are always so proud of their finished cards. Bonus craft - do green for a tree and yellow pompom for star.

🎁 Idea submitted by Lyndsay Paige ~ learn more about this amazing caregiver at
🎁 Photo from Glued to My Crafts
Ornament Canvas Tree
This brilliant Christmas craft because is so easy fuss free! It looks adorable, takes very little prep, and is genuinely easy enough for kids of all ages.
Diana made this last year and loved it so much that she grabbed supplies again yesterday from Five Below. She spent about $15 total and was able to make 5 complete canvas trees, which makes this a great option for babysitters, classrooms, holiday parties, or families crafting together at home.
What You’ll Need
Brown construction paper
Small canvas boards
Mini ornaments in assorted sizes and colors
Glue gun (adult use only) or strong craft glue
Markers or crayons
Pom poms or red stickers for noses
Optional embellishments
Garland or faux greenery
Star sticker or mini topper
Battery tea lights
How to Make It
Lay the canvas flat and arrange the ornaments into a tree shape before gluing.
Start from the bottom and work your way up, gluing ornaments in rows that taper toward the top.
Add a final ornament or small topper at the top of the tree.
Glue a strip of garland or greenery along the bottom for a finished look.
Let dry completely before displaying upright.
✨ For younger kids, adults can handle the glue while children help design the layout and choose colors.
Why We Love It
This craft feels festive and keepsake worthy without being complicated or messy. Kids love choosing their ornament colors and seeing their tree come together, and parents love that it looks cute enough to display year after year.
It’s also a win for sitters because it• Requires minimal supplies• Has very little cleanup• Works well for mixed age groups• Looks impressive without being time consuming


🎁 Idea & 1st Photo submitted by Diane ~ learn more about this amazing caregiver at
🎁 2nd Photo from Wood Craft Blueprints
A Cozy Holiday Wrap Up
As December continues, it’s often the smallest moments that mean the most. Sitting together at the table. Creating something with little hands. Sharing a warm treat and a few quiet laughs.
Whether you are crafting reindeer cards, building ornament trees, baking cookies, or simply slowing down for a moment, we hope these ideas help you enjoy the heart of the season.
From all of us at 30A & Coastal Babysitters, thank you for trusting the caregivers with your families throughout the year. We are so grateful to be part of your holiday memories and wish you a joyful, peaceful, and love filled remainder of December 🎄💛


Comments