


Whisk & Wonder: January's Featured Ideas
- Jennifer Preston
- Jan 3
- 4 min read


It's time to start the New Year!
2026 offers endless possibilities for spending quality time together through fun, easy, and affordable crafts and recipes. Begin a New Year's resolution with your little ones and follow along every month with Whisk & Wonder, full of sparkling fun and new traditions.
Create one or all of the ideas shared on Whisk & Wonder and post your craft and/or recipe with us to be entered in a year-long competition. The more you participate, the greater your chances are to win 4 free hours with 30A & Coastal Babysitters!
For all who are beginning their journey with us through the magic of craft and kitchen, we share a few ideas every month to help get the creative juices flowing. Every month, a different babysitter/caregiver graciously and enthusiastically provides ideas they love doing with little ones. If you have a fantastic idea you would like to share, please do so and it could be in the next issue!

Paper Plate Puffy Paint Snowman
One of my personal favorites to do with kids. They love smearing the puffy paint on the snowman!
What you’ll need
3 various sizes of paper plates
Shaving cream
Elmer’s school glue
Tape
Paint or stencil brush
Construction paper
Felt for scarf
Googly eyes
Small orange pom for nose
Handful of small black poms for smile
3 larger poms for buttons
How to Make Them
Tape the 3 various sizes of paper plates together.
Mix up a batch of homemade puffy paint. Equal parts shaving cream and Elmer’s school glue.
Paint the plates with puffy paint!
Cut a simple top hat out of construction paper and a scarf out of the felt.
Once the snowman is completely covered in puffy paint, its time for the embellishments. Make sure the puffy paint is still wet when applying
Set aside to dry


Idea submitted by Karen ~ learn more about this caregiver at
Photos from Capturing Parenthood
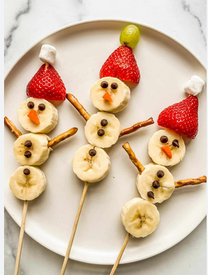
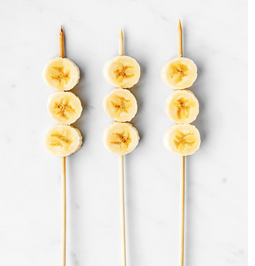
Banana Snowman Snack
What you’ll need
Bananas
Strawberries
Grapes
Carrot
Mini chocolate chips
Pretzel sticks
Skewers -wooden skewers, plastic skewers, paper lollipop sticks, or popsicle sticks as the spears. Or just lay flat on a plate
How to Make Them
Cut bananas about 1/2 inch thick
Cut the green stem off the strawberries so that the bottom is flat.
Cut grapes in half.
Trim the carrots into small triangular slivers for a classic carrot nose.
Carefully take the skewer and poke through the bananas so the flat side is up.
Next poke through strawberry to make the hat with the pointy end on top.
Poke half a grape on top of the strawberry.
Poke the mini chocolate chips into the top banana slice for eyes and 2-3 chocolate chips into the second banana slice for buttons.
Gently poke a thin sliver of the carrot underneath the eyes.
Stick the pretzel sticks in the sides to make arms.
✨ Depending on the day, I will skip the carrot nose to make the snack even easier to make. You can also use mini marshmallows instead of the grape for a cute little hat topper.


Idea submitted by Karen ~ learn more about this caregiver at
Photos from Healthy Little Bites
Popsicle Stick Snowflakes
I absolutely love a good popsicle stick craft. This one has easy cleanup, and there's no stress when the little ones go wild with sequins!
What you’ll need
Popsicle sticks (4 sticks per snowflake)
Hot glue gun/glue - if you have one
White glue
Sequins, buttons, glitter, jewels, stickers, pom poms - pretty much any fun decorations you have on hand!
How to Make Them
I like to prep by hot gluing the sticks together to form the snowflake before giving them to kids. This way the glue is dry and ready to be worked on.
Put a sheet of paper under the snowflake the child is going to be working on. Keeps surface free from glue and super easy cleanup!
Put white glue on sticks.
Have fun with decorating! Anything goes as long as everyone is having fun and using their creative spirit.
Let dry.
Shake off any loose embellishments.
Hot glue a ribbon or twine to create a loop so they can hang up their creations.


Idea submitted by Karen ~ learn more about this caregiver at
First 3 Photos from Toddler Approved
Last Photo from Benson Street
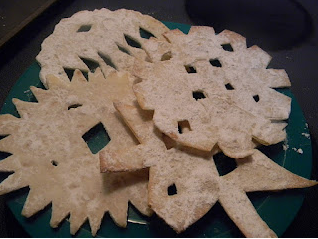
Sweet Snowflakes
I was looking for a simple and fun snowflake recipe to make with kids. I couldn't really find anything that wasn't more of a baking project for adults until I came across this fabulous one! It's nostalgic and delicious all at once.
What you’ll need
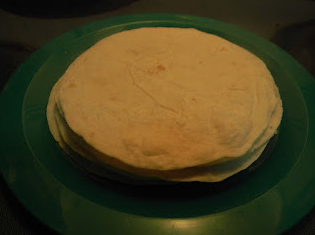
Small tortillas
Scissors
Vegetable oil
Powered sugar
How to Make Them
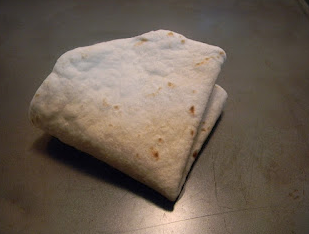
Start with 6 small tortillas. Heat them in the mircowave for 15 seconds to make them soft and easy to fold.
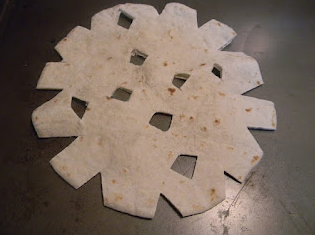
Fold the tortilla and cut it with a pair of kitchen shears like you would a paper snowflake. If your kids are bigger or if you have scissors safe for smaller children this is a fun activity for the kids to do. They do not need to be perfect, all snowflakes are different.
Unfold the tortilla and see your creation.
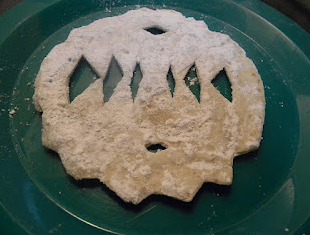
Coat the snowflakes with coat of vegetable oil on both sids and bake in a 400 degree preheated oven for 3-4 minutes.
Coat the snowflakes with powered sugar. This part was a bit messy so I covered them on a cookie sheet. .
✨ The finished snowflakes are sweet and yummy. They taste a bit like an elephant ear, but are much healthier because they are baked and not fried. They are also quick to make, you can make a batch start to finish in less than 10 minutes.

Idea submitted by Karen ~ learn more about this caregiver at
Photos and directions from Pams Party & Practical Tips
With Love and Inspiration
All of us at 30A & Coastal Babysitters would like to extend our gratitude for entrusting your families to the caregivers throughout the year. We are honored to be part of your journey. As a small local business with over 11 years in the area, we ensure all sitters are thoroughly vetted, background checked, reference checked, CPR and Water Safety certified and professional.
Booking is easy at https://www.30aandcoastalbabysitters.com/, where our prices are transparent and there are no lengthy forms to complete!


Comments